When the first real cold snap hits, it doesn't matter how hard the furnace runs — if warm air is leaking out around the doors and windows, the house is basically paying to heat the outdoors. The fix is one of the cheapest, fastest upgrades any homeowner can make: weatherstripping. A roll of foam tape and an afternoon of work can seal the invisible gaps that make rooms feel chilly, and the difference is noticeable the very first night the temperature drops. No special skills are required — if you can hold a tape measure and peel a sticker, you can weatherstrip a house.
Why Weatherstripping Makes Such a Big Difference
The average home has enough small gaps around doors, windows, and other openings to equal a window left open year-round. It sounds dramatic, but it surprises most people for good reason. You don't need to see daylight through a crack for cold air to pour in — a gap of just an eighth of an inch around a single exterior door is enough to create a noticeable draft in the room behind it.
The symptoms are familiar: a cold pocket of air near the front door, curtains that stir slightly even when windows are closed, or rooms on one side of the house that never quite warm up. Weatherstripping doesn't fix insulation problems in walls or attics, but it handles the easiest and most immediate source of heat loss — the gaps within arm's reach.
The practical payoff goes beyond comfort. Heating systems that run less often last longer and need fewer service calls, and sealed rooms hold a steadier temperature so the thermostat stays satisfied. It's one of the few projects where the cost is under twenty-five dollars and the results are immediate.
Finding Every Draft Before Buying Materials
Walking around with a lit incense stick or a candle on a windy day is the classic method — hold it near the edges of doors and windows and watch for the flame or smoke bending sideways. It works remarkably well, especially around the top corners of doors where gaps like to hide.
The paper check is another reliable test: close a door on a dollar bill, then try to pull it out. If it slides out easily, air is getting through. Work around all four sides of every exterior door, then candle-test each window's sash edges and the seam where the frame meets the wall.
Make a quick list as you go — which doors, which sides, and roughly how wide each gap is. This tells you exactly what type and how much weatherstrip to buy, and photos of the worst gaps make handy references while shopping.
Choosing the Right Weatherstrip Material
Not all weatherstrip is the same, and the best choice depends on the location and how much use it will get. Here are the most common types and where each one belongs:
- Adhesive-backed foam tape: The most popular option for most homes. Rolls come in widths from about 1/4 to 1/2 inch. Best for irregular gaps and the stop moulding of doors. Inexpensive and easy to install, but needs replacing every couple of years.
- V-strip (tension seal): A durable plastic or metal strip folded into a V that springs open to bridge a gap. Excellent for double-hung and sliding windows, where the seal must compress repeatedly. More durable than foam.
- Door sweeps: Aluminum or plastic strips with a rubber or bristle fin that attach to the bottom of a door. Essential for the gap under exterior doors, often the worst draft point in the house. Match the sweep to the gap — they come in versions for gaps from 1/8 inch up to 1-1/4 inches.
- Tubular rubber or silicone gaskets: Round or P-shaped profiles that compress when the door closes. The longest-lasting option, and the best pick for main entry doors that open and close many times a day.
- Felt strips: Cheap and easy to press into place with tacks or staples. Best for low-traffic interior doors or temporary fixes — it wears down quickly in exposed exterior spots.
A good rule of thumb: foam tape for most window frames and the sides and top of doors, V-strips for sliding or double-hung window sashes, and a door sweep plus a tubular gasket for exterior doors.
Tools and Materials to Have on Hand
The list is short, so gather everything before starting to keep the job flowing:
- Weatherstrip materials (foam tape, V-strip, door sweeps as needed)
- Tape measure and pencil
- Utility knife or sharp scissors
- Clean rags plus rubbing alcohol or all-purpose cleaner — surfaces must be clean for adhesive to bond
- Flat-head screwdriver or putty knife for removing old, hardened weatherstrip
- Hacksaw for cutting metal door sweeps to length
- Caulk and a caulk gun — weatherstrip seals moving parts; caulk seals fixed gaps where the frame meets the wall
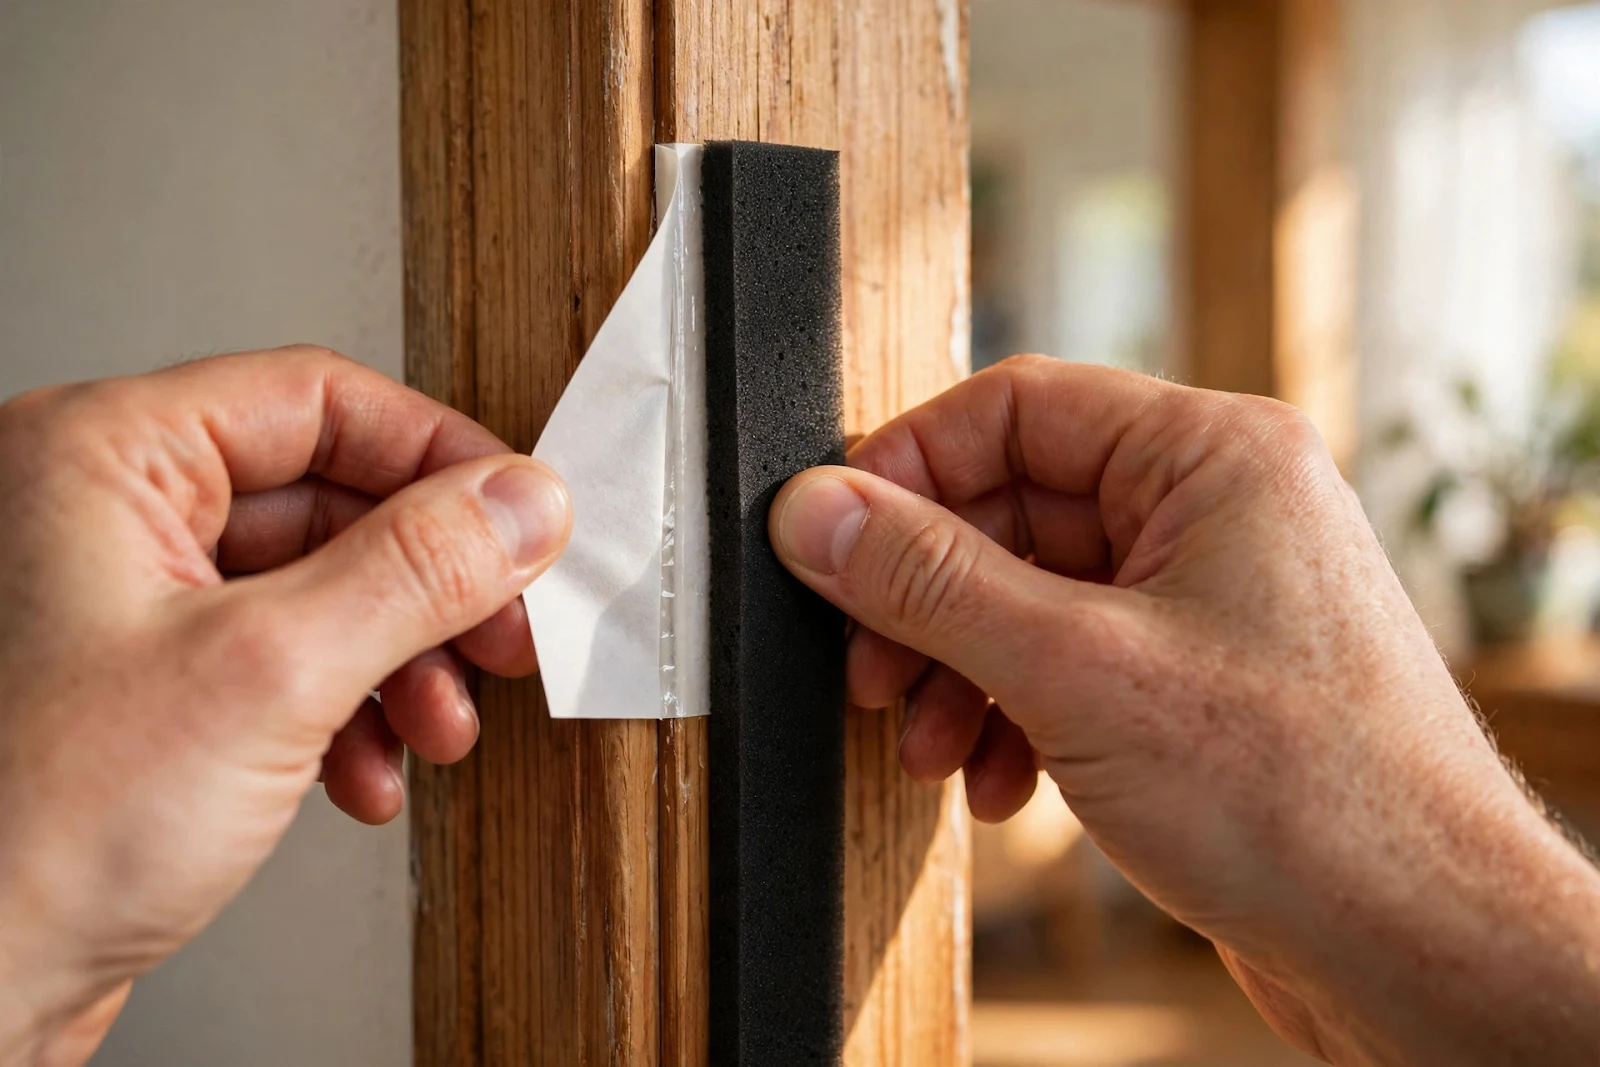
Step-by-Step: Sealing Your Doors
Step 1 — Clean the surfaces. Close the door and wipe down the door stop (the narrow strip of wood the door closes against) on all three sides with a damp rag, then rubbing alcohol. Adhesive foam will not stick to dusty, greasy wood — scrape off any old, crumbly weatherstrip with a putty knife first.
Step 2 — Measure each side. Measure the height of the hinge side and latch side, and the width across the top. Cut foam tape or gasket strips a little long — you can always trim, and a gap at the corner defeats the purpose.
Step 3 — Apply to the door stop, not the door. Peel the backing and press the weatherstrip onto the stop moulding — the frame the door closes against — not onto the moving door. Position it so the door compresses the strip by about half its thickness when closed. Test the latch after each side; if the door won't latch easily, the material is too thick.
Step 4 — Handle the bottom gap. Measure the gap between the door bottom and the threshold, then fit a sweep. Hold it against the door, mark the length, cut with a hacksaw, and attach it so the fin just brushes the threshold — light contact, not drag.
Step 5 — Check the threshold itself. Many entry doors have adjustable thresholds — look for screw heads along the top. Turning these raises or lowers the plate to close the gap under the door, a detail people often miss.
Step 6 — Test everything. Close the door firmly and run the candle test around all four sides. Open and close it a few times to confirm the latch catches easily and the sweep doesn't scrape.
Step-by-Step: Sealing Your Windows
Windows take a little more patience because there are more types, but each follows the same principle: seal where the moving part meets the frame, and caulk where the frame meets the wall.
Step 1 — Identify the window type. Double-hung windows (sliding up and down) leak where the two sashes meet in the middle and along the side tracks. Sliding windows leak along the meeting rail and the tracks. Casement windows (hinged on the side, cranking open) leak around the whole perimeter and usually take foam or gasket strips best.
Step 2 — Clean and prep. Clean the sash edges and frame channels with a damp cloth and let them dry fully. Remove any loose, cracked glazing putty on the outside — that's a job for fresh putty or exterior caulk, not weatherstrip.
Step 3 — Apply V-strip to double-hung windows. Cut it to length, fold it along the crease, and press it into the side channels where the lower sash slides. The V springs open and seals the gap while still letting the sash move. For the meeting rail where the two sashes come together, thin foam tape on the top edge of the lower sash works well.
Step 4 — Seal sliding windows. Apply V-strip or foam tape along the vertical meeting rail and the horizontal tracks. The track gap is often the single worst leak on a sliding window, even though it looks sealed.

Step 5 — Caulk the exterior gaps. Walk outside and check where each window frame meets the siding or brick. Any visible gap there is caulk's job — a single bead of exterior-grade caulk, tooled smooth with a wet finger, seals it for years.
Step 6 — Check the lock. On double-hung windows, the sash lock should pull the two sashes tightly together. A loose lock leaves a hairline gap at the meeting rail all winter. Some locks have adjustable strike plates — a small adjustment can close that gap completely.
Common Mistakes to Avoid
A few errors show up again and again, and each one wastes materials or time:
- Installing on a dirty surface. Adhesive weatherstrip peeling off by January is almost always a cleaning failure, not a product failure.
- Using one material for everything. Thick foam on a tight door makes the latch stick; thin felt on a main entry door gets flattened in a month. Match the material to the gap size and traffic level.
- Sealing windows shut with caulk. Never caulk a window sash to its frame — caulk goes between the frame and the wall only. Sealing the sash itself means the window can't open, a fire-safety problem.
- Ignoring the bottom of the door. Many people weatherstrip three sides of a door and skip the sweep, even though the bottom gap is often the largest of the four.
- Leaving gaps at the corners. Cut strips a touch long and trim after test-fitting — drafts concentrate at the top corners.
How Long It Lasts and When to Replace
Adhesive foam tape on a frequently used exterior door typically lasts one to three years; on a rarely opened window it can last five or more. V-strips and tubular rubber or silicone gaskets usually last five to ten years, while door sweeps last until the rubber fin wears down — generally three to five years of daily use. Check everything each fall before heating season: if foam no longer springs back or a sweep's fin is cracked or worn flat, replace it. Recheck a week after any installation too, since adhesive settles and humidity shifts the wood.
Frequently Asked Questions
Is it worth doing if I rent? Absolutely, especially with removable options. Adhesive foam tape peels off cleanly in most cases, and fabric door draft stoppers require no installation at all. Just avoid anything needing screws or permanent changes without the landlord's permission.
A Small Project With an Outsize Payoff
Very few home improvement projects deliver this much for so little. For the cost of a takeout dinner and one afternoon, you can seal the drafts that make winter miserable — the cold floor by the front door, the chilly bedroom that never warms up, the furnace that runs all night. Start with the worst offender, usually the main entry door, and work through the house from there.
