The water heater is one of the most quietly hardworking appliances in any home. It runs every day, often without a second thought, heating water for showers, dishes, laundry, and handwashing. Most people only notice it when something goes wrong: the shower turns lukewarm halfway through, the water smells odd, or a puddle appears on the floor nearby. By that point, the repair is usually more expensive than the maintenance that would have prevented it. A little regular care can add years to a water heater's life, keep energy bills lower, and prevent the kind of sudden failure that floods a utility closet or basement at the worst possible time.
Water heater maintenance is not complicated, and it does not require special skills. The core jobs are simple: flush sediment out of the tank once a year, check the anode rod every couple of years, test the safety valve, and keep the temperature at a sensible level. Most of these tasks take less than an hour, and many homeowners can do them with basic tools.
Why Water Heater Maintenance Actually Matters
Inside every tank-style water heater, the water leaves behind minerals as it heats. In areas with hard water, this sediment builds up quickly, forming a layer at the bottom of the tank. That layer insulates the water from the heating element or burner, so the heater has to work harder and longer to reach the same temperature, which raises energy use. It also causes the bottom of the tank to overheat in spots, which can weaken the steel and shorten the tank's life. And it can break loose in flakes that clog fixtures, reduce water pressure, and make the water look cloudy or rusty.
A well-maintained tank water heater typically lasts eight to twelve years. A neglected one in a hard-water area can fail in six or seven. The difference is often just one annual flush and an anode rod that gets replaced when it wears out. Those two jobs cost very little compared with an emergency replacement plus the cost of any water damage. Regular care also keeps the water hotter and cleaner, so showers stay comfortable and the dishwasher and washing machine work at their best.
Know Which Type of Water Heater You Have
Before starting any maintenance, it helps to know what kind of heater is installed. The most common type is the storage tank heater: a tall cylinder, usually in a garage, basement, or utility closet, that holds forty to fifty gallons of hot water ready to use. It runs on gas or electricity. Gas models have a burner at the bottom and a vent pipe on top; electric models have heating elements inside the tank and a power connection on the side.
The second type is the tankless, or on-demand, heater: a compact box mounted on the wall that heats water only when a tap is opened. Tankless heaters have no storage tank, so there is no sediment to flush from a tank, but they still need care, mainly descaling to remove mineral buildup from the heat exchanger. The third, less common type is the heat pump or hybrid water heater, which pulls warmth from the surrounding air and uses far less electricity than a standard electric tank. Hybrid models have an air filter that needs regular cleaning, along with the same tank care as a standard electric heater. The label on the side of the unit states the type, capacity, fuel, and manufacture date, which tells you how old the heater is and whether a repair is worth the cost or whether replacement is the smarter choice.
How to Flush a Tank Water Heater
Flushing is the single most useful maintenance job for a tank heater, and it should be done once a year, or twice a year in areas with very hard water. It involves hot water, so take it slowly and let the tank cool before starting. Turn off the heater first: for a gas model, set the thermostat to pilot or turn the gas control to off; for an electric model, switch off the breaker. Then turn off the cold water supply valve at the top of the tank.
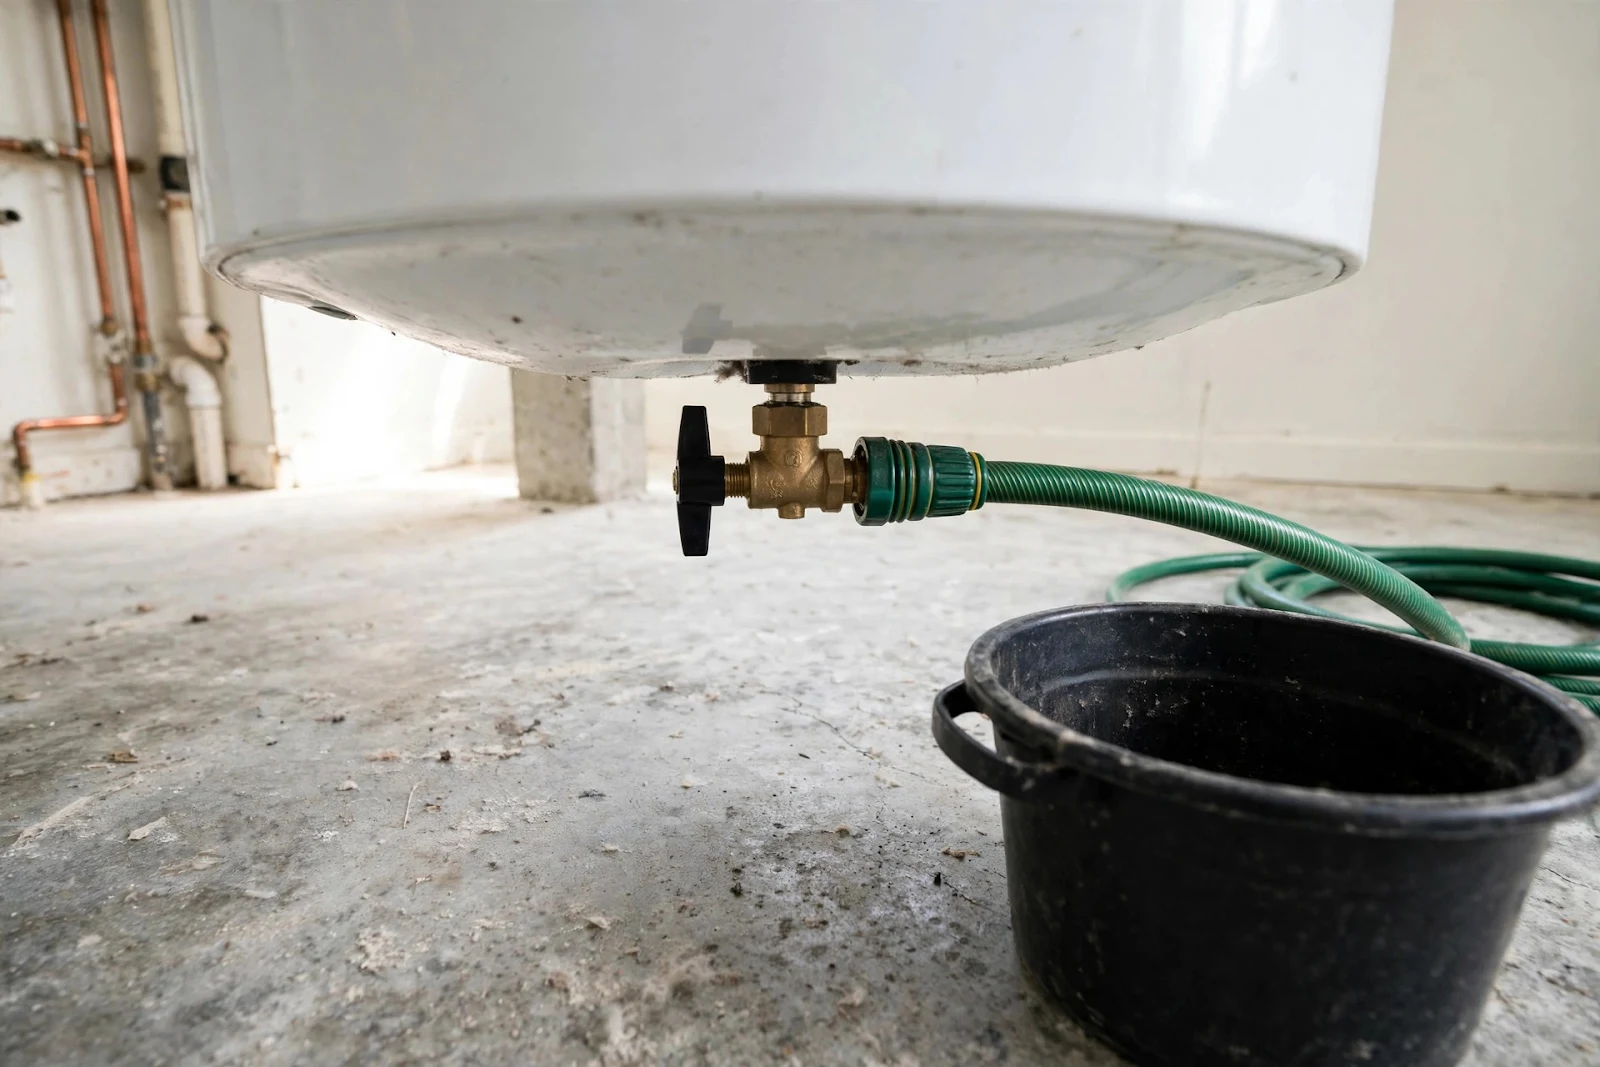
Next, open a hot water tap somewhere in the house, such as a kitchen faucet, and leave it open. This prevents a vacuum from forming inside the tank as it drains. Connect a garden hose to the drain valve at the bottom of the tank and run the other end to a safe place outside, a floor drain, or a large bucket. Open the drain valve and let the water flow out. At first the water may be cloudy or rusty, which is normal and is exactly what the flush is meant to remove. Let the tank drain until the water runs clear, which usually takes twenty to forty minutes depending on the tank size.
Once the water runs clear, close the drain valve, remove the hose, turn the cold water supply back on, and let the tank refill. When water flows steadily from the open hot tap without sputtering, the tank is full and the air is out. Close the tap, then turn the heater back on: relight the pilot or restore the gas control for a gas model, or switch the breaker back on for an electric model. The water will take thirty to sixty minutes to heat fully.

Check the Anode Rod Every Two to Three Years
The anode rod is the water heater's quiet bodyguard. It is a long metal rod, usually magnesium or aluminum, screwed into the top of the tank. Its job is to corrode in place of the steel tank: the minerals and chemicals in the water attack the rod first, sparing the tank walls. When the rod is used up, the tank itself starts corroding, and that is when leaks and rust appear. Checking the rod every two to three years and replacing it when it is worn is one of the cheapest ways to extend a heater's life.
To check it, turn off the power or gas and the cold water supply, then unscrew the rod from the top of the tank with a socket wrench. Pull it out and look at it: if the rod is mostly eaten away, coated in calcium, or reduced to a thin wire, it needs replacing. A healthy rod still has most of its diameter and a fairly smooth surface. Replacement rods are inexpensive and available at hardware stores, and the job takes about half an hour. If the rod will not budge, or if the ceiling is too low to pull the full rod out, a flexible segmented rod is available, and a plumber can fit it.
Test the Temperature and Pressure Relief Valve
The temperature and pressure relief valve, often called the T and P valve, is the heater's main safety device. It sits on the top or side of the tank with a discharge pipe running down toward the floor. If the pressure inside the tank climbs too high, the valve opens and releases water, preventing a dangerous buildup. Testing it once a year confirms it still works, and a valve that fails to open when tested should be replaced promptly.
To test it, place a bucket under the discharge pipe, then lift the valve's lever for a few seconds and let it snap back. Hot water should flow out of the discharge pipe while the lever is lifted, and the flow should stop when the lever closes. If no water comes out, or if the valve keeps dripping afterward, it needs replacing. This is a job many homeowners can do with a wrench and some thread sealant, but if the valve is corroded in place, calling a plumber is the sensible choice. Never cap or plug the relief valve, and never remove it.
Set the Temperature and Insulate the Tank
Most manufacturers ship water heaters set to 140 degrees Fahrenheit, but 120 degrees is enough for most households and is the temperature most energy experts recommend. Water at 120 degrees is hot enough for showers, dishes, and laundry, while reducing the risk of scalding and cutting the energy used to keep the tank hot. Lowering the setting also slows mineral buildup inside the tank.
Insulation is another easy win. An insulating blanket wrapped around an older tank reduces heat loss, especially if the heater sits in a cold garage or basement. Blankets are inexpensive, but they should never cover the burner area, the thermostat, or the top of a gas heater. The first few feet of hot water pipe leaving the tank are worth insulating too: foam pipe sleeves are cheap, slip on in minutes, and keep the water hotter on its way to the taps.
Tankless Water Heaters Need Descaling
Tankless heaters do not have a tank to flush, but mineral scale still builds up inside the heat exchanger, and it has the same effect: the heater works harder, heats less efficiently, and eventually throws error codes or shuts down. Descaling once a year is the standard recommendation, and twice a year in very hard water areas. The job involves connecting a small pump and a bucket of food-grade vinegar or a commercial descaling solution to the heater's service valves, circulating the solution for thirty to sixty minutes, and then flushing it out with clean water.
Many tankless models have built-in service valves and a maintenance mode that makes this straightforward, and descaling kits with the pump, hoses, and solution are widely available. The exact steps vary by brand, so the owner's manual is the best guide. If the heater has never been descaled and is several years old, or if error codes are already appearing, a professional descaling is worth paying for.
Signs It Is Time to Call a Professional
Some water heater problems are maintenance jobs, and some are repair jobs, and knowing the difference saves both money and mess. A puddle of water around the base of the tank, rust-colored water from the hot taps, rumbling or popping noises during heating, and water that never gets properly hot are all signs to call a plumber rather than keep maintaining. Rumbling usually means heavy sediment has hardened at the bottom of the tank, and by the time the water runs rusty, the tank itself may be corroding from the inside.
Age matters too. If a tank heater is over ten years old and needs a major repair, replacement often makes more sense than repair. A plumber can check the overall condition and give an honest assessment.
A Simple Yearly Maintenance Schedule
The easiest way to keep up with water heater care is to put it on the calendar once a year, ideally in the same month every time so it becomes a habit. In spring or autumn, when the heating system is also getting attention, is a natural time. The annual routine takes about an hour: flush the tank, test the relief valve, check the temperature setting, and look around the base and fittings for any dampness, rust, or corrosion. Every two to three years, add the anode rod check. For tankless heaters, the annual job is descaling plus cleaning the inlet filter screen.
Keep a short written record of each job: the date, what was done, and anything noticed, such as a slightly rusty anode rod or a valve that dripped briefly after testing. That record is useful when talking to a plumber and when deciding whether a repair or a replacement is the better call. A water heater that is flushed yearly, protected by a healthy anode rod, and fitted with a working safety valve will usually outlast a neglected one by several years, while using less energy and delivering steadier hot water. For one hour a year, that is a very good return.
