Replacing a light switch is one of the most approachable electrical jobs a homeowner can take on. It takes about thirty minutes, requires only basic tools, and costs far less than calling an electrician for such a small task. A worn switch that crackles, feels loose, or only works when you press it just right is not something you have to live with. With the power off and a careful, methodical approach, most beginners can swap in a new switch safely and confidently.
That said, electricity deserves respect. This guide walks through every step in order, including how to confirm the power is truly off before you touch a single wire. If anything in your switch box looks unfamiliar or damaged, stop and call a licensed electrician.
When a Light Switch Needs Replacing
Switches wear out gradually, so the signs are easy to miss until they become annoying. A switch that buzzes, sparks, or feels warm to the touch should be replaced right away. The same goes for a switch that flickers the light when nobody is touching it, or one that has to be flipped several times before the light responds. A cracked toggle or a yellowed faceplate is a cosmetic reason, but it is still a good excuse to upgrade.
Many people also replace switches as part of a room refresh. Swapping old ivory toggles for clean white rocker switches, or adding a dimmer to a dining room, can make a space feel noticeably newer for very little money.
Safety First: The Rules That Are Not Optional
Never work on a switch with the power on. Never assume a switch is dead just because the light is off; a faulty switch can leave the circuit live even when the bulb is dark. Always test with a non-contact voltage tester after switching the breaker off. Never work in a wet area, with wet hands, or while standing on a damp floor.
If your home has old wiring, such as knob-and-tube or aluminium branch wiring, or if you open the box and find scorched wires, melted insulation, or a tangle of wires you cannot identify, close it up and call a professional. A thirty-minute job is never worth a safety risk.
Tools and Materials You Will Need
Gather everything before you start so you are not hunting for a tool with the power off and the room dark. You will need a new switch of the same type, a flathead and a Phillips screwdriver, a non-contact voltage tester, wire strippers, needle-nose pliers, and electrical tape. A headlamp or battery-powered work light is extremely useful, since the room light will be off during the job.
Buy the right replacement switch before you begin. A standard single-pole switch controls one light from one location and is the most common type. A three-way switch controls one light from two locations, such as the top and bottom of a staircase, and has three terminal screws instead of two. Take a photo of the old switch and its wiring before you remove anything, and match the new switch to it. If you want a dimmer, check that your bulbs are dimmable first.
Step 1: Turn Off the Power at the Breaker
Go to your breaker panel and find the breaker that controls the room. Breaker panels are usually labelled, but labels are often wrong, so flip the breaker and then check the switch itself. If the light no longer turns on, you have likely found the right one. For complete certainty, plug a lamp into an outlet on the same circuit and confirm it is dead too.
If you cannot identify the correct breaker, turn off the main breaker to cut power to the whole house. Tell anyone else in the house what you are doing so nobody flips the breaker back on while you are working.
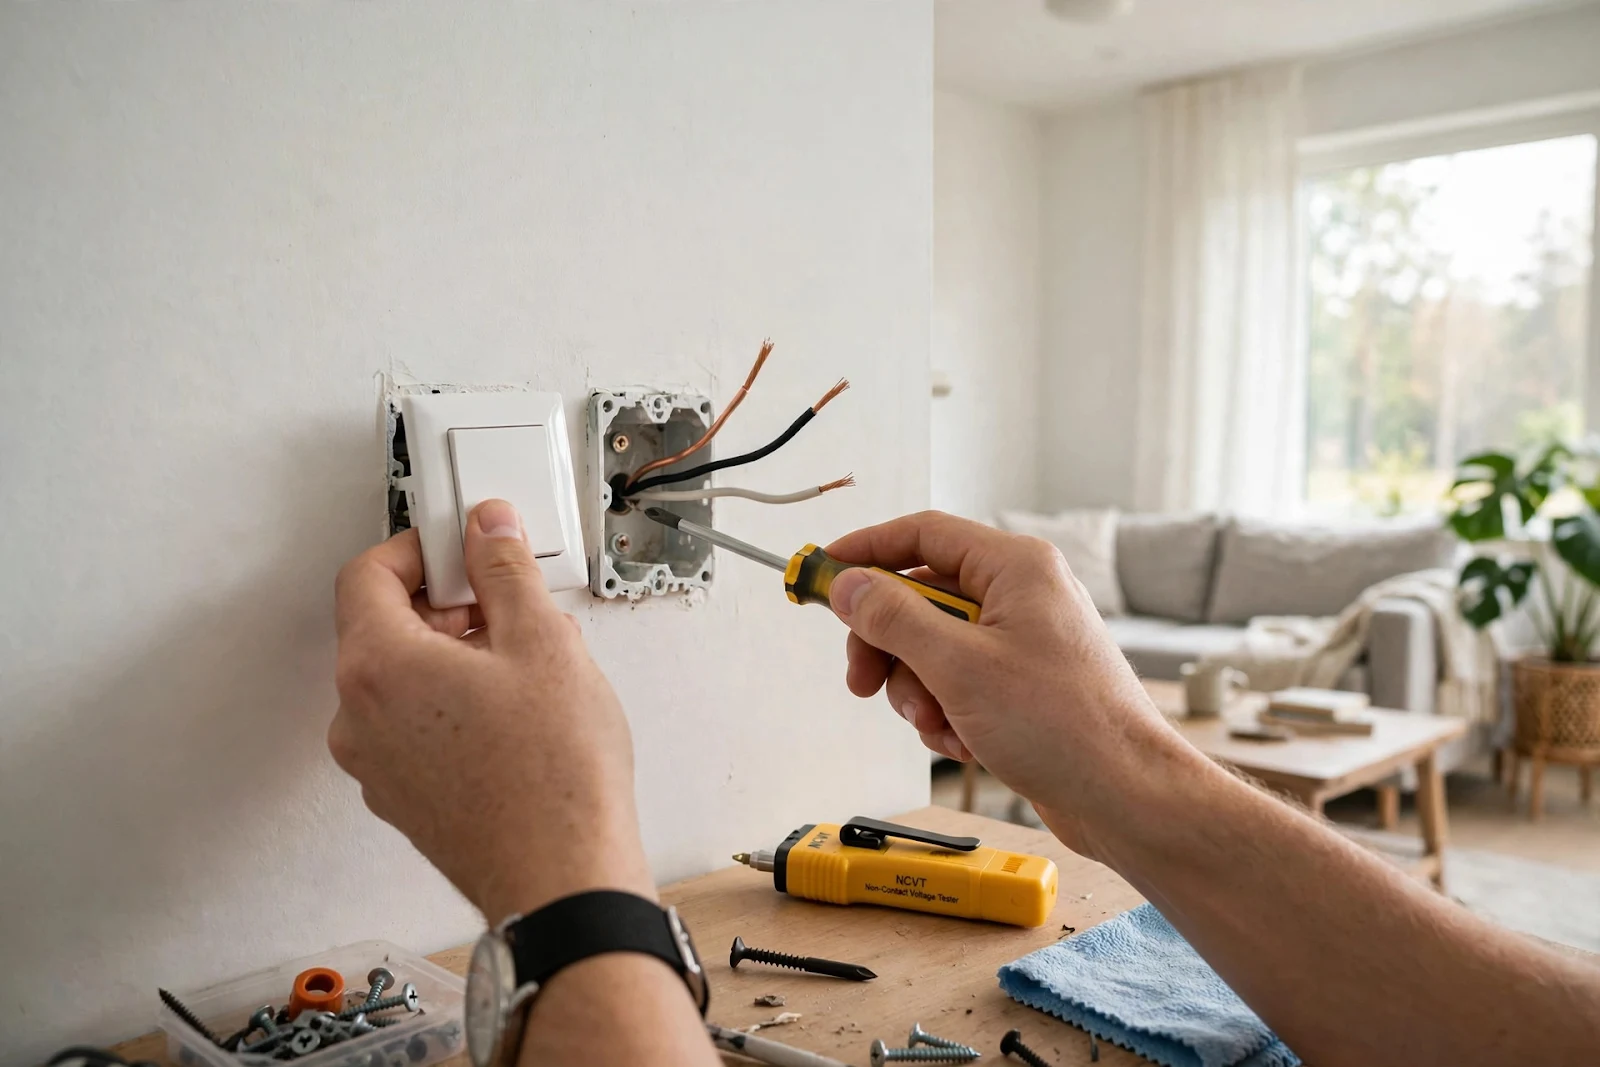
Step 2: Test That the Power Is Really Off
Hold a non-contact voltage tester near the switch and near each wire inside the box. A good tester beeps or lights up when voltage is present. Test it first on a live outlet you know is working, so you know the tester itself is functioning, then test the switch. Only proceed when the tester stays silent at the switch. This double-check takes ten seconds and is the single most important safety step in the entire job.
Step 3: Remove the Faceplate and the Old Switch
Unscrew the faceplate and set it aside with its screws. Then unscrew the two mounting screws holding the switch to the electrical box and gently pull the switch out. Do not yank it; the wires attached to it are only a few inches long. Take a clear photo of the wiring now, showing which wire connects to which screw.
You will typically see two or three wires. The black wires are hot, the white wires are neutral, and the bare copper or green wire is the ground. On a standard switch, the black wires connect to the brass or dark terminal screws, and the ground wire connects to the green screw. White neutral wires are usually joined together with a wire nut inside the box and do not connect to a standard switch at all.
Step 4: Disconnect the Old Switch
Loosen the terminal screws and free each wire. If the wires are pushed into holes in the back of the switch, insert a small flathead screwdriver into the release slot next to each hole while gently pulling the wire out. Straighten the hooked ends with pliers so they are ready for the new switch. If a wire end looks nicked or frayed, trim it back to clean copper and strip about three quarters of an inch of fresh insulation.
Note how the old switch was wired. One black wire brings power in and the other carries it out to the light. Their positions do not matter for a standard single-pole switch, but for a three-way switch, the common wire must go on the common terminal, usually marked with a darker screw. Your photo will show you exactly where it was.
Step 5: Connect the New Switch
Start with the ground wire. Wrap the bare copper wire clockwise around the green ground screw and tighten it firmly. Wrapping clockwise matters because the screw tightens in that direction and pulls the wire loop snug instead of pushing it open.
Next, connect the two black wires to the two terminal screws. Form each wire into a neat hook with needle-nose pliers, hook it clockwise around the screw, and tighten until it is snug. Give each wire a gentle tug to confirm it is secure. Screw terminals are generally more reliable than push-in holes, so use them when both options exist. Then wrap a short strip of electrical tape around the body of the switch, covering the terminal screws, so a screw cannot accidentally touch the side of the metal box.
Step 6: Mount the Switch and Replace the Faceplate
Fold the wires neatly back into the box, taking care not to pinch or sharply bend them. Push the switch into place and fasten it with the two mounting screws, but do not over-tighten. If the switch sits crooked, loosen the screws slightly, straighten it, and retighten. Then attach the faceplate. A level switch with a flush faceplate is the detail that makes the job look professional.
Step 7: Restore Power and Test
Go back to the breaker panel and flip the breaker on. Return to the switch and flip it on and off several times. The light should respond crisply every time, with no buzzing, flickering, or delay. If you installed a dimmer, slide it through its full range and check for smooth dimming without buzzing or flicker.
If the light does not work, turn the breaker off again and recheck your connections. The most common beginner mistake is a wire that slipped off its screw or a ground wire touching a terminal. If everything looks right and it still does not work, the problem may be the bulb or the fixture rather than the switch, so test with a bulb you know works.

Common Mistakes to Avoid
The biggest mistake is skipping the voltage test. Breaker labels lie, and a switch can look dead while still carrying current. The second most common mistake is over-stripping wires, which leaves bare copper exposed outside the terminal and creates a short-circuit risk. Strip only the length you need, about three quarters of an inch.
Another frequent error is using the wrong switch type. A single-pole switch will not work properly in a three-way setup, and a standard switch cannot dim lights. Match the new switch to the old one, and check the amperage rating printed on it. Most residential switches are rated for 15 amps. Finally, do not force wires into an overcrowded box; fold them in gently in an accordion pattern.
Upgrading to a Dimmer or Smart Switch
Once you are comfortable with a standard swap, a dimmer is a natural next step. Dimmers use the same wiring as a standard switch, but they are deeper, so check that your box has room. Choose a dimmer rated for your bulb type, especially with LEDs, and look for one labelled LED-compatible.
Smart switches add remote control and scheduling, but they usually need a neutral wire in the box, which older homes may not have at the switch location. Check for a bundle of white wires capped with a wire nut inside the box before buying one. If there is no neutral wire, choose a model designed to work without one.
When to Call an Electrician
Some situations are outside the scope of a beginner job. Call a professional if you find aluminium wiring, scorched or melted wires, a buzzing breaker, or a switch box with no ground wire in a home that should have one. Also call one if the circuit trips repeatedly, if you smell burning near a switch, or if you need a new switch location where no box exists yet.
Frequently Asked Questions
Do I need to turn off the main breaker, or just the circuit breaker? Turning off the single circuit breaker is enough, as long as you verify with a voltage tester that the switch is dead. If you are unsure which breaker controls the switch, turn off the main breaker to be safe.
Can I replace a switch without a voltage tester? It is not recommended. A non-contact tester costs very little and is the only reliable way to confirm the circuit is dead. Flipping the switch and seeing the light stay off is not proof, since a faulty switch can leave the wires live.
How long should a light switch last? A quality switch typically lasts fifteen to twenty years under normal use. Switches in high-traffic areas, such as kitchens and hallways, wear out sooner because they are flipped far more often.
Replacing a light switch is a satisfying first electrical project because the result is immediate and visible every time you walk into the room. Work slowly, test twice, and keep your photo of the original wiring close at hand. With those habits, a beginner can finish the job safely in under half an hour.
