Why the TV Stand Deserves More Thought Than It Usually Gets
A TV stand or media console does more work than almost any other piece of furniture in a living room. It holds the screen everyone looks at, hides the boxes and cables nobody wants to see, stores the remotes and game controllers that pile up in daily life, and anchors the whole seating arrangement. Yet it is often treated as an afterthought, picked in a hurry because the TV needed somewhere to sit. The result is a piece that is too small for the screen, too cluttered to look calm, or too open to ever stay tidy.
Styling a media console well is not about turning a living room into a showroom. It is about making a hard-working piece of furniture look intentional while it keeps doing its job. The best setups share a few qualities: the stand fits the TV and the room, the cables are dealt with once and stay dealt with, storage matches what actually lives there, and the styling on top adds warmth without competing with the screen. It requires a few measurements and honest decisions about what needs to be stored.
Choosing the Right Size Stand for the TV and the Room
The most common mistake with a TV stand is buying one that is too narrow. A good rule is that the stand should be wider than the television by at least a few inches on each side. For a 55-inch TV, which measures roughly 48 inches across, a stand around 58 to 65 inches wide gives the screen a proper frame and leaves room for a lamp or a small stack of books at one end. When the stand is narrower than the screen, the TV looks top-heavy and unstable, and there is nowhere to put anything except directly in front of the screen.
Height and depth matter just as much as width. The center of the screen should sit close to eye level when seated, which for most sofas means about 42 inches from the floor, so a stand between 20 and 26 inches tall usually works best. Most consoles are 16 to 20 inches deep, which suits a TV on its feet and leaves space for a soundbar in front; if the stand will hold a gaming console or a receiver, measure the deepest item first and add two inches for airflow and cables. Leave a few inches of breathing room on each side of the console rather than wedging it wall to wall, since a stand that fills about two-thirds of its wall usually looks balanced.
Closed Storage vs. Open Shelving: Pick What Matches Real Life
Media consoles generally fall into three camps: fully closed cabinets with doors, open shelving, and a mix of the two. Closed storage is the best choice for most living rooms, because doors and drawers hide game controllers, charging cables, DVDs, and board games while the outside stays calm. Look for soft-close hinges and drawers that glide fully open, since media storage gets used daily, and if the household includes small children, closed storage also keeps fragile items out of reach and out of sight.
Open shelving looks lighter and more modern, and it suits households that genuinely keep few media items, such as a small collection of books or a record player. The catch is that open shelves show everything, including dust, tangled cables, and stacks of remotes, so they demand constant editing to look good. The mixed approach is often the most practical compromise: closed cabinets for the messy essentials, with one or two open shelves for display, or glass-fronted doors that hide clutter while letting a remote signal pass through. Whatever the layout, count the devices, controllers, and chargers that need to live at the console before buying, because a stand that is full on day one will be overflowing by month two.
Cable Management That Actually Stays Tidy
Cables are the part of a TV setup most likely to be ignored until they become a visible tangle, but a tidy result takes one focused hour rather than ongoing effort. Start by unplugging everything and laying out what actually needs to connect: usually a power strip, one or two HDMI cables, a power cable for the TV, and perhaps an ethernet or optical audio cable. Anything not in regular use, such as an old streaming stick or a spare charger, should be removed entirely rather than left dangling behind the console.
Route cables through the console rather than around it, using the cutouts or grommets in the back panel that most media consoles include for exactly this purpose. Leave just enough slack for a device to slide forward for cleaning, and bundle the rest with reusable velcro ties, never single-use zip ties that must be cut whenever something changes. Label each cable at both ends so unplugging one device later does not mean tracing a mystery cord. Hide the power strip in a cable-management box or mounted to the inside of the back panel, and run a paintable cord cover from the TV down to the console to conceal the cables that travel between the two.
Styling the Top Surface Without Creating Clutter
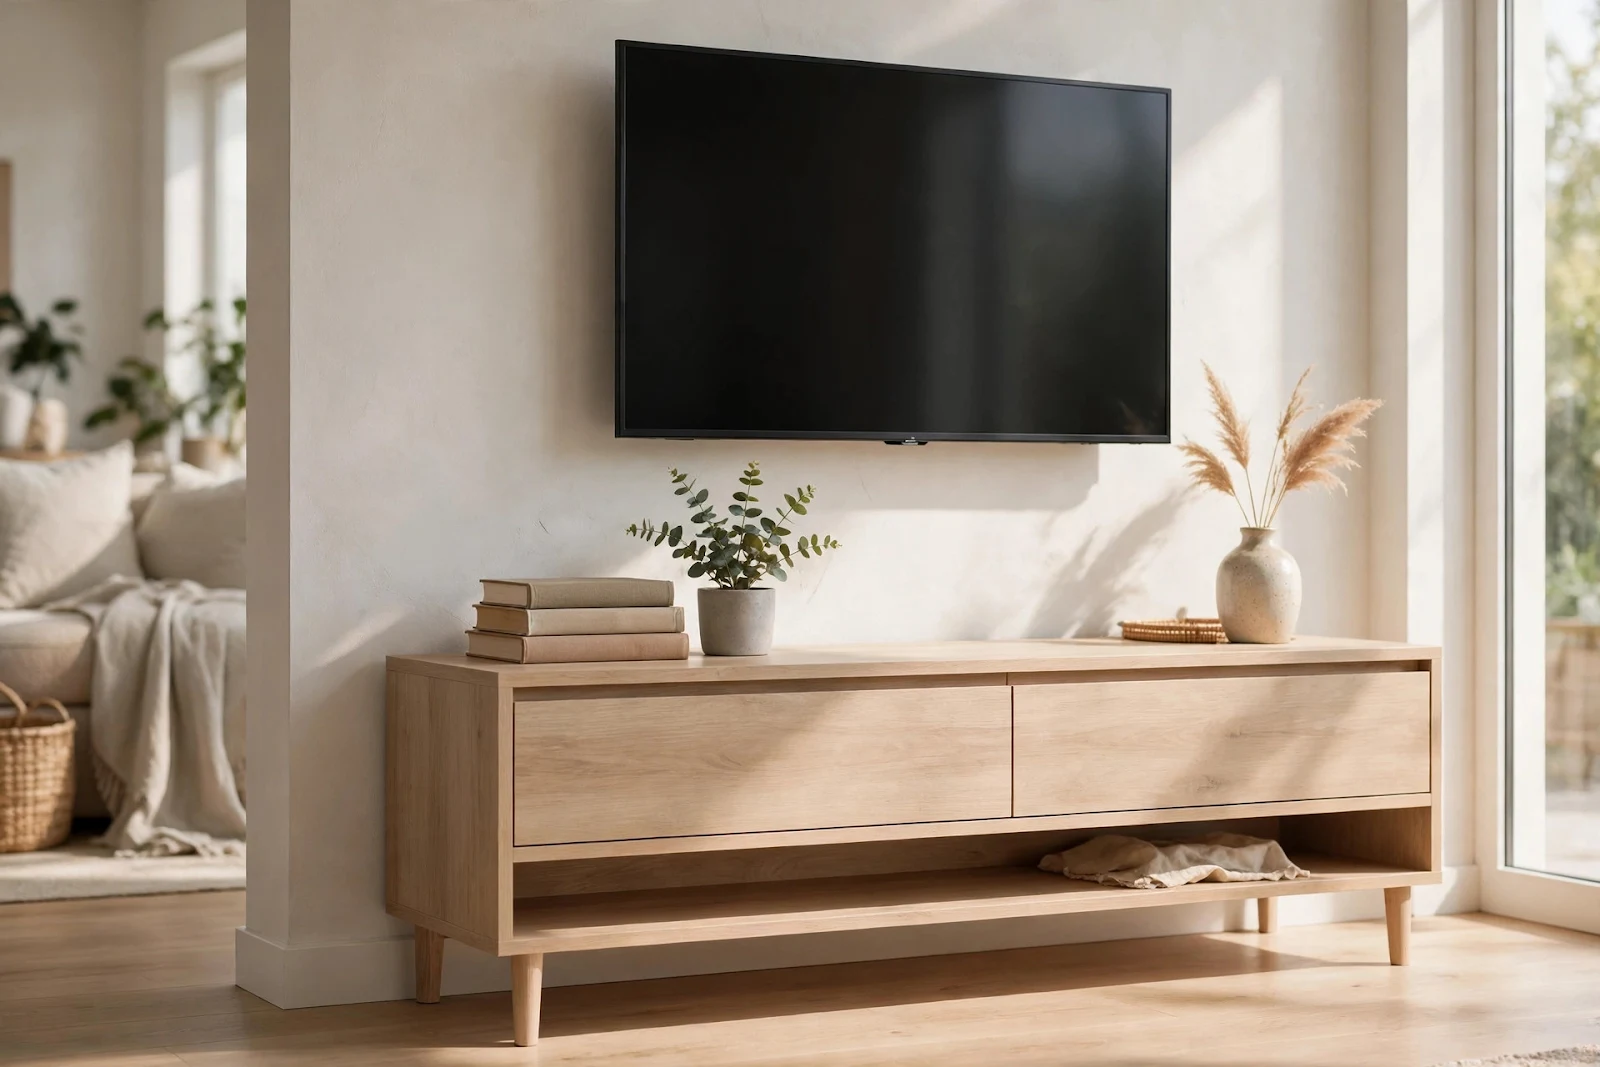
The top of a media console is prime decorating space, but it is also where clutter collects fastest. The goal is a surface that looks styled from the sofa and still leaves room for a remote, a mug, or a phone without knocking something over. Work in odd numbers and clear groupings: a single lamp at one end, a small stack of two or three books in the middle, and a plant or vase at the other end creates a balanced composition without crowding the surface. Group small items on a tray so they read as one arrangement instead of several scattered objects.
Height variation is what keeps a console top from looking flat. A table lamp adds vertical presence at one end, while a stack of books or a low bowl keeps the other side grounded. A compact plant adds softness and movement, though a fast-growing vine will soon drape over the screen, so faux plants work well here since the console top is often in low light and near a heat source. Keep the center clear if the TV sits on the stand, since anything tall directly in front of the screen blocks the view, and leave at least a hand's width of empty surface somewhere on the console, because a surface with no empty space at all looks crowded no matter how nice the individual pieces are.

Balancing the Screen So It Does Not Dominate the Room
A large black rectangle is a strong visual presence, and a living room can easily start to feel like it revolves around the screen. The fix is not to hide the television but to give the eye other things to rest on, so the screen becomes one element of a composed wall rather than the only thing in the room. A pair of framed prints, a floating shelf with a few objects, or a tall plant beside the console all reduce the screen's dominance by adding visual weight elsewhere. The key is proportion: artwork roughly one-half to two-thirds the width of the TV usually holds its own without overwhelming the wall, while pieces that are too small next to a 65-inch TV look lost.
Color and light help too. A console in a warm wood tone or a soft painted finish breaks up the black of the screen far better than another black box, and if the console and the TV are both black, warmth can come from the styling on top: a wooden tray, a ceramic vase, brass or woven textures, or a lamp with a fabric shade. A lamp on the console creates a warm pool of light that balances the glow of the screen in the evening, and bias lighting, a strip of soft light fixed to the back of the TV, reduces eye strain and makes the screen look like it floats rather than glaring from a dark wall.
Wall-Mounted TV vs. Stand-Mounted TV: Styling Each One Differently
Whether the TV hangs on the wall or stands on the console changes how the space below it should be styled. A wall-mounted TV frees the console top entirely, since the screen floats above the furniture and nothing blocks the view, so the console can hold a soundbar, a lamp, books, and decor more generously. The trade-off is that cables between the TV and the console become visible unless they run inside the wall or behind a cord cover, and the mount height must be chosen carefully, since moving a wall-mounted TV later means patching holes.
For a wall-mounted setup, hang the TV so its center sits at seated eye level, about 42 inches from the floor, and leave a gap of roughly 6 to 12 inches between the bottom of the screen and the top of the console. A larger gap makes the TV and console feel disconnected, while a soundbar mounted on the wall between them fills the gap neatly. A stand-mounted TV is simpler to install and easier to adjust, and it suits renters or anyone who rearranges often. The screen sits directly on the console, anchoring the two pieces together, though the TV feet occupy the center of the console top, so decor must live at the sides and the feet must fit comfortably within the console's depth.
Keeping It Practical for Daily Use and Cleaning
A beautifully styled console that is hard to live with will not stay beautiful for long. Choose surfaces that forgive real life: a console top in wood, laminate, or a sealed stone-look finish wipes clean with a damp cloth and hides the occasional ring mark far better than high-gloss lacquer or untreated raw wood. Coasters and a tray under drinks protect the finish, a washable mat under a lamp or plant pot catches dust and water, and a candle on a tray or inside a lantern is safer and easier to move when dusting than one placed directly on the wood.
Cleaning should be quick, not a project. A console with closed doors needs only a weekly wipe of the top and a dust of the doors, while open shelves collect dust faster, so a feather duster kept in a nearby drawer makes a thirty-second pass easy. Dust the TV screen with a dry microfiber cloth, never with a wet cloth or household spray, and dust behind the console every few weeks. Build in a simple weekly reset: return every remote to its tray, clear any mugs or papers from the console top, and check that nothing new has migrated onto the surface. If an item keeps ending up on the console, give it a proper home elsewhere instead of fighting the same battle every week.
A Console That Works as Good as It Looks
Styling a TV stand or media console comes down to a handful of decisions made in the right order: size the stand to the TV and the room, choose storage that matches what actually lives there, deal with the cables once and properly, and style the top with a few well-chosen pieces rather than a crowd of them. Balance the screen with decor and light so it does not dominate the wall, and keep the whole arrangement easy to use and easy to clean. The result is a living room that feels calm when the TV is off and comfortable when it is on: a room that works every day and still looks good doing it.
